In this article I’ll show the various raid levels of a practice way and the basic manage to add or remove disks to our raid device. First of all we have to partition our hard disk with the type of partition code fd, used for Linux RAID software
Create the partition and select the partition type for every hard disk:
root@debian6:~# fdisk /dev/sdb
WARNING: DOS-compatible mode is deprecated. It's strongly recommended to
switch off the mode (command 'c') and change display units to
sectors (command 'u').
Command (m for help): n
Command action
e extended
p primary partition (1-4)
p
Partition number (1-4): 1
First cylinder (1-5221, default 1):
Using default value 1
Last cylinder, +cylinders or +size{K,M,G} (1-5221, default 5221):
Using default value 5221
Command (m for help): t
Selected partition 1
Hex code (type L to list codes): fd
Changed system type of partition 1 to fd (Linux raid autodetect)
Command (m for help): w
The partition table has been altered!
Calling ioctl() to re-read partition table.
Syncing disks.
- RAID 0
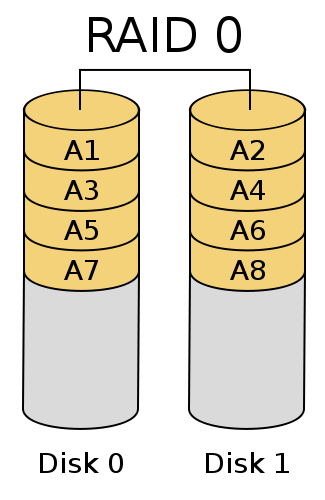
root@debian6:~# mdadm --create /dev/md0 --level=0 --raid-devices=2 /dev/sdb1 /dev/sdc1
RAID 0 stores the data between two or more disks. With this raid level win in speed of read/write, but if one of the disks fails the data will be lose.
- RAID 1
root@debian6:~# mdadm --create /dev/md0 --level=1 --raid-devices=2 /dev/sdb1 /dev/sdc1
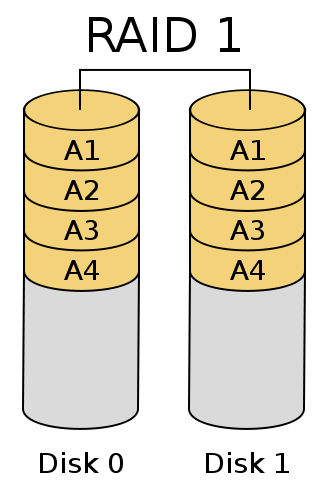 RAID 1 or mirror stores a copy of a disk in one or more disks, with this way if one disk fail, the other disks can replace the failed disk.
- RAID 4/5
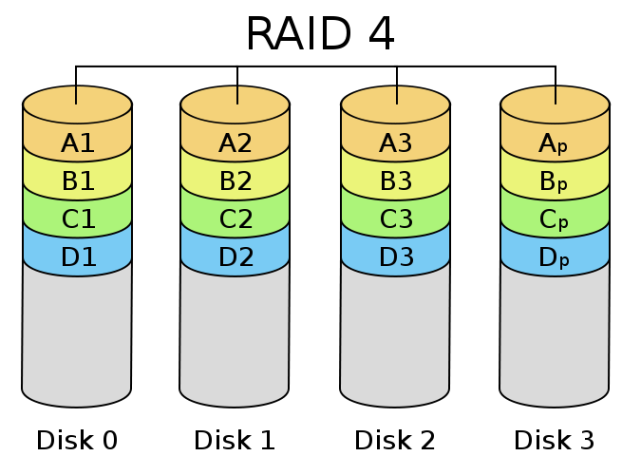
root@debian6:~# mdadm --create /dev/md0 --level=4 --raid-devices=3 /dev/sdb1 /dev/sdc1 /dev/sdd1
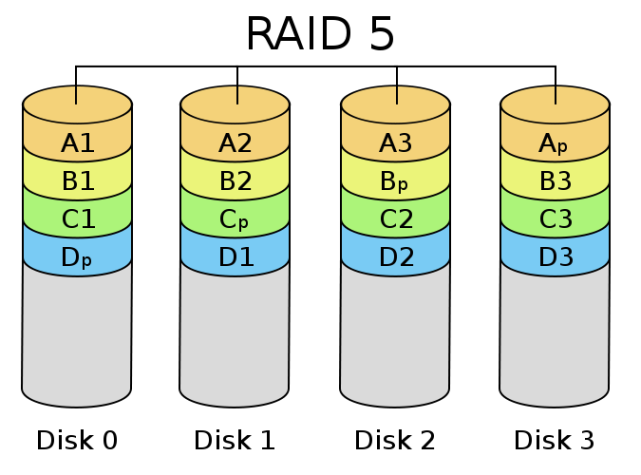
The RAID 4 we have to user a minimum of three disks. This raid level keep the advantage of raid 0 and raid 1, storing the data between the different disks but using a dedicated disk to parity (control errors) to restore the data if one of the disks fails.
RAID 5 it’s the same that RAID 4, but the parity it’s stored between the different disks.
For RAID 4 or 5 the size of device will be (Number of disks -1).
- RAID 6
root@debian6:~# mdadm --create /dev/md0 --level=6 --raid-devices=4 /dev/sdb1 /dev/sdc1 /dev/sdd1 /dev/sde1
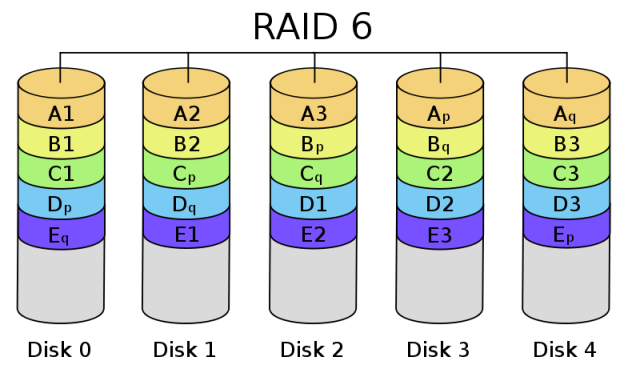
The minimum of disks used for RAID 6 is 4. In RAID 4 or 5 if two disks fails we have lost the stored data. With RAID 6 increase the amount of parity data between disks. The size will be (Number of disks – 2).
- RAID 10
root@debian6:~# mdadm --create /dev/md0 --level=10 --raid-devices=4 /dev/sdb1 /dev/sdc1 /dev/sdd1 /dev/sde1
RAID 1+0 is a combination of raid 0 with raid 1. The minimum number of disks used is 4.
- Saving our RAID configuration
root@debian6:~# mdadm --detail --scan >> /etc/mdadm/mdadm.conf
- Stopping a RAID device
root@debian6:~# mdadm --stop /dev/md0
- Starting a raid device
root@debian6:~# mdadm --assemble --scan
- Replacing a disk
1.- Select a disk as failure disk before removing it:
root@debian6:/mnt# mdadm --manage --set-faulty /dev/md0 /dev/sdc1
2.- Remove the disk:
root@debian6:/mnt# mdadm --manage --remove /dev/md0 /dev/sdc1
3.- Add the new hard disk, partition it and add to the raid device:
root@debian6:/mnt# mdadm --manage --add /dev/md0 /dev/sdc1
- Expand the raid devices
1.- Partition the new disk and add to the raid device:
root@debian6:/mnt# mdadm --manage --add /dev/md0 /dev/sdf1
2.- Expand the number of partitions:
root@debian6:/mnt# mdadm --grow --raid-devices=5 /dev/md0
3.- Resize the filesystem (ext2/ext3/ext4):
root@debian6:/mnt# umount /dev/md0
root@debian6:/mnt# fsck -f /dev/md0
root@debian6:/mnt# resize2fs /dev/md0
Before the resize:
After:
For more information you can visit: https://raid.wiki.kernel.org



excellent information, but you should add information about tools for testing the proper functioning of the RAID
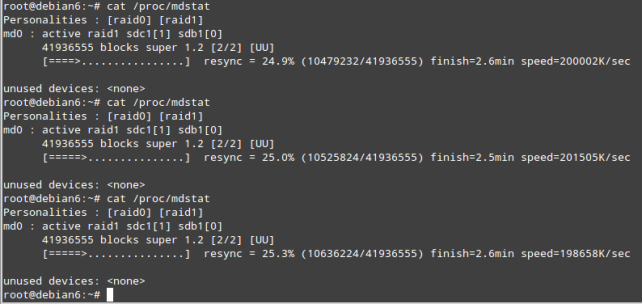
Thank you for the suggestion!! You have reason about it. I usually read the file /proc/mdstat to monitor the raid device status or the command line mdadm with the options –query –detail. I think I’ll write in other post about other tools to monitor the performance of RAID devices and other disk features.
English
Congratulations tutorial. Perfect! I searched the whole internet to find something like that and I ended up finding something better. Thank you.
Portugues
Parabéns pelo tutorial. Perfeito! Procurei a internet toda para encontrar algo parecido e acabei encontrando algo melhor. Muito obrigado.